Setting up Openstack with VMware Integrated Openstack(VIO) and VMware NSXv is a breeze as compared to installing and configuring each Openstack component manually. I have been messing around with VIO since its early beta days and have been able to setup the enterprise ready Openstack more than a couple of times without any issues.
As deploying VIO itself is quite easy, in this post I will walk through deploying instances in VIO with internal and external networks using the Horizon Dashboard.
For the labs I have been using a Ubuntu 14.04 JEOS OVA image, you can download the OVA from HERE
Note: If the VM does not pick up a DHCP IP, the OS will take time to boot up completely, the screen will remain blank during boot up.
Credentials to login to the VM:
Username: root
Password: vmware
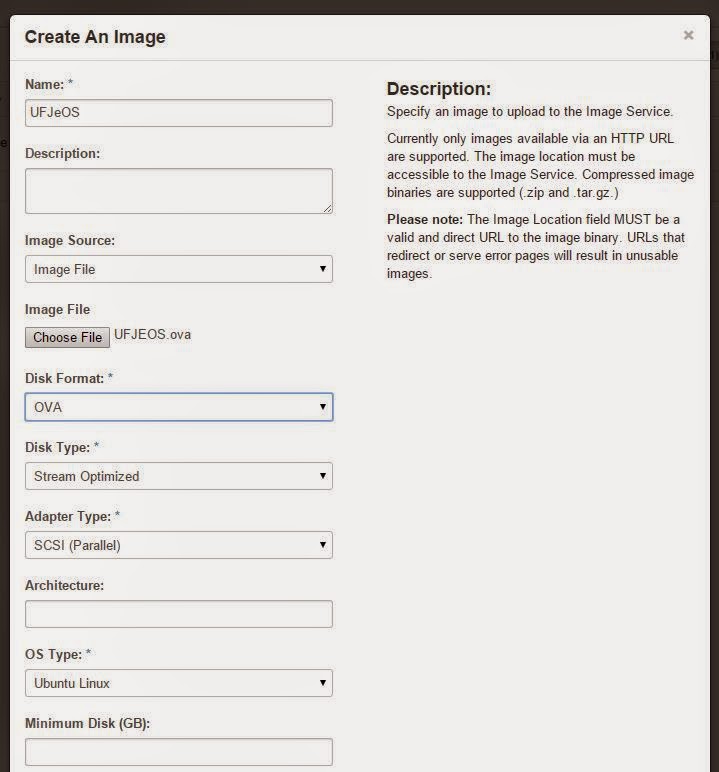
- Lets start by importing the above image(OVA) into Openstack glance. Navigate to Projects>Compute > Images>Create Image

2.Use the following information and click
Create Image
Name : UFJeOS
Image Source : Image File
Image File : UFJEOS.ova
Disk Format : OVA
Disk Type : Stream Optimized
Adapter Type: SCSI (Parallel)
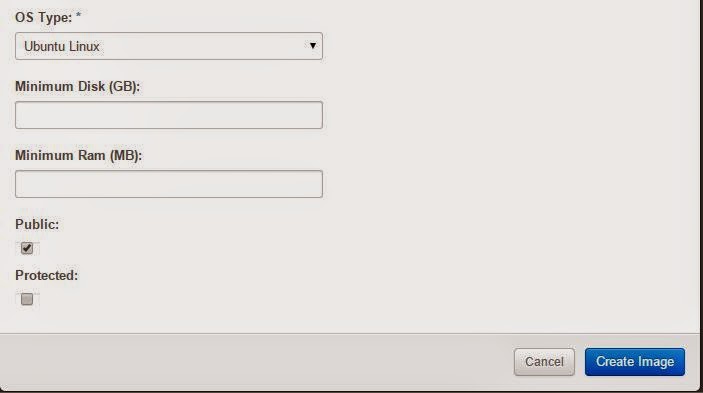
OS Type : Ubuntu Linux
Public : True
- After the ova image has been successfully imported it will be listed as below

- Before we can launch an instance off the image we need to create a network for the instance. In order to create a private network, navigate to either
Project > Network > Network Topology or navigate to Project > Network > Networks and select Create Network

- Use the following information to create a private network(Customize as required):
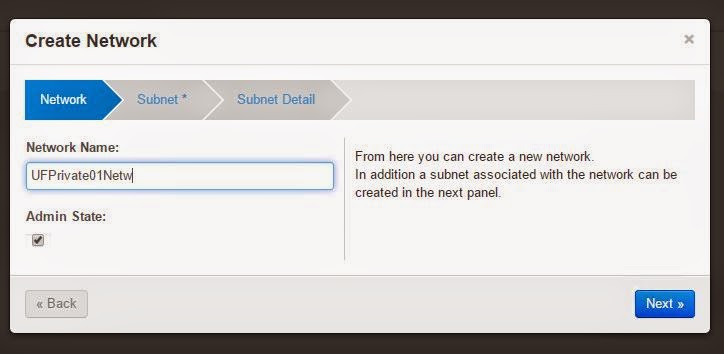
- For Network:
Network Name: UFPrivate01
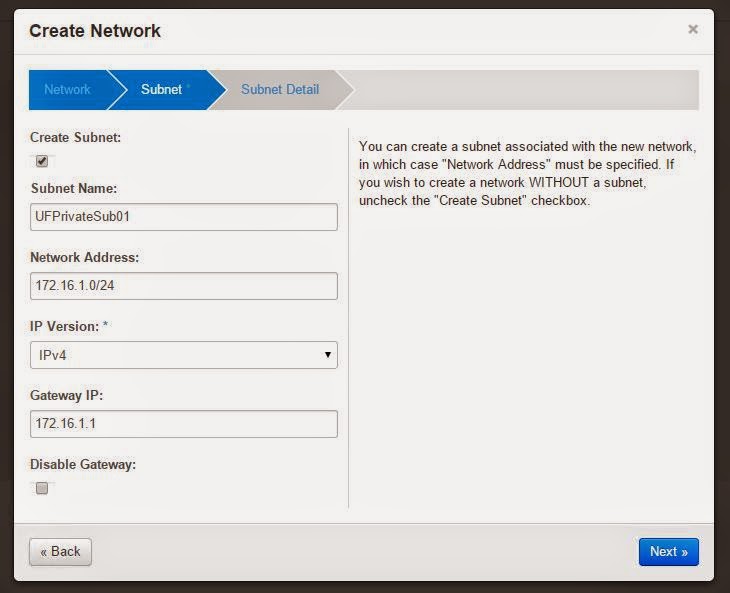
Admin State: True - For Subnet:
Create Subnet: True
Subnet Name: UFPrivateSub01
Network Address: 172.16.1.0/24
IP Version: IPv4
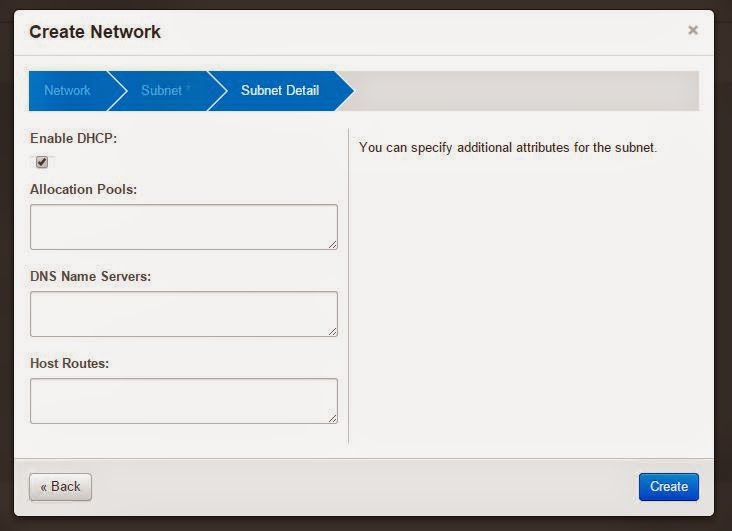
Gateway IP: 172.16.1.1** - For Subnet Detail:
Enable DHCP: True
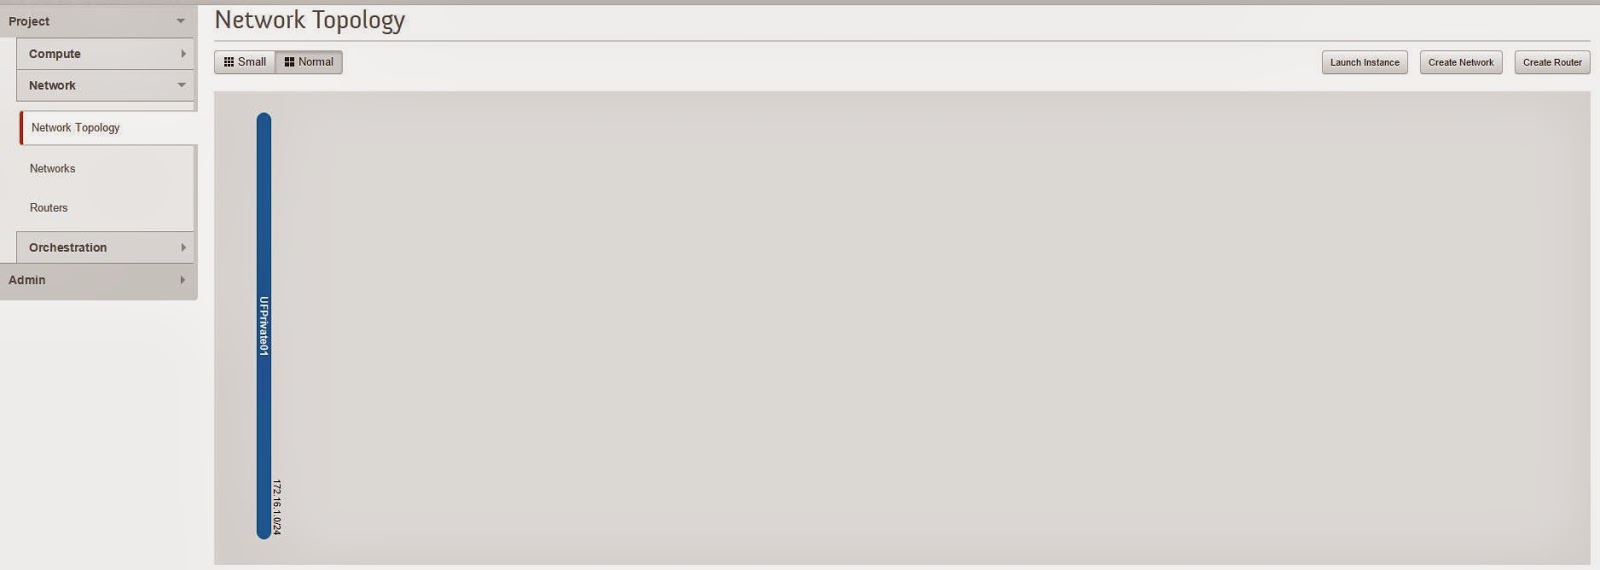
- After the network has been created successfully it would be listed as:
- Now we can go ahead and launch an instance off the ova image we imported previously.
To launch an instance navigate to: Project > Compute > Instances and click on Launch Instance

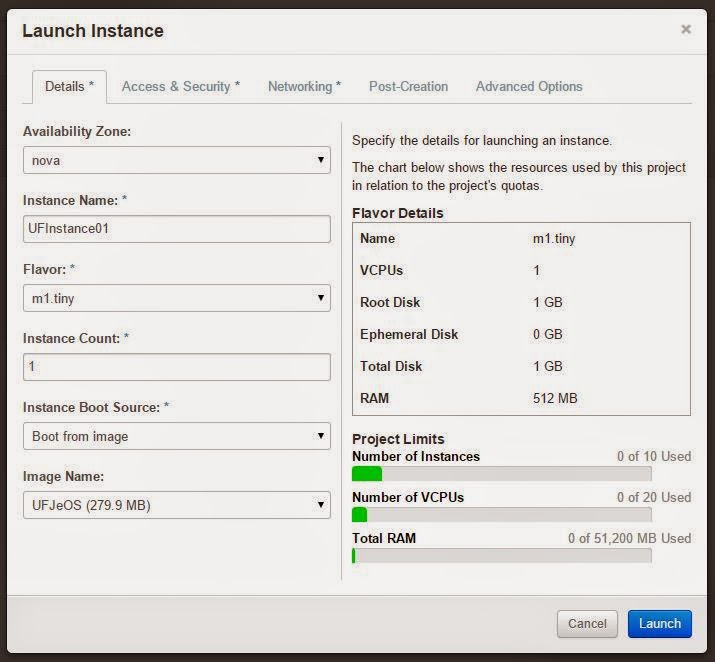
- Use the following information to Launch the Instance:
- Details:
Availability Zone: nova
Instance Name: UFInstance01
Flavor: m1.tiny
Instance Count: 1
Instance Boot Source: Boot from image
Image Name: UFJeOS - Access & Security: Leave default
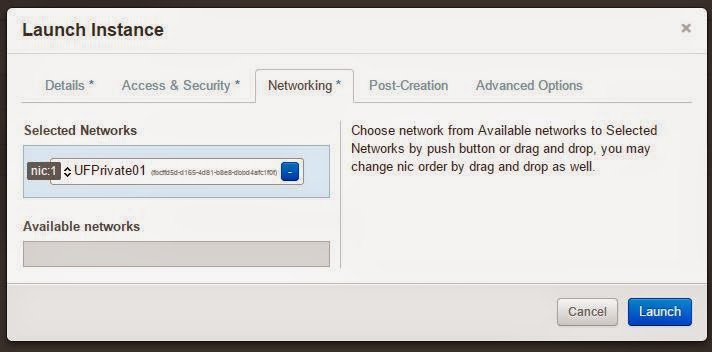
- Networking:
Selected Networks: UFPrivate01 - Post-Creating: Leave default
- Advanced Options: Leave default
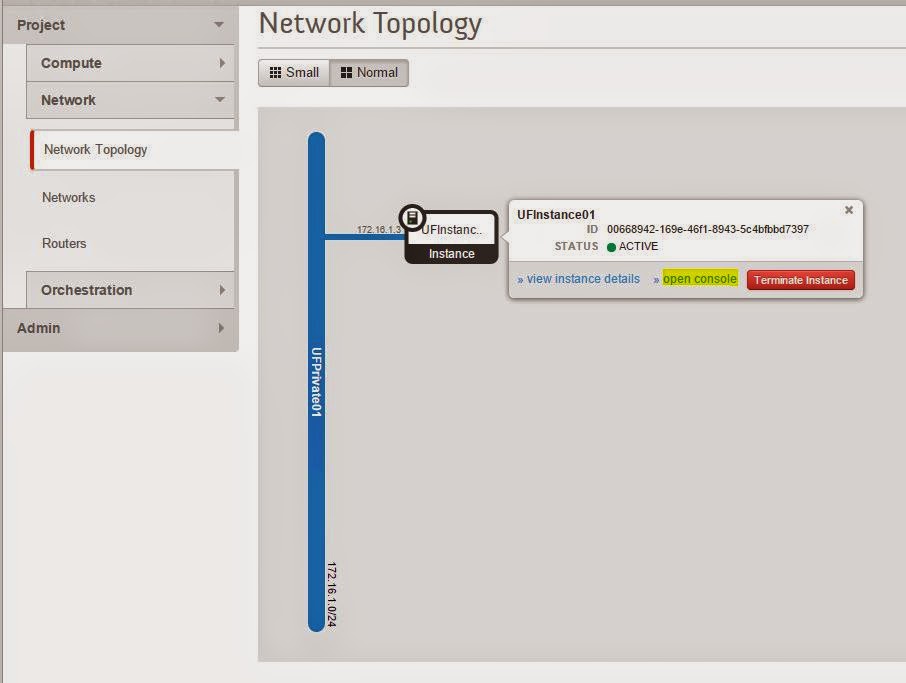
- The first instance will take some time to deploy. After the instance VM has been successfully created in vSphere the status will be listed as:

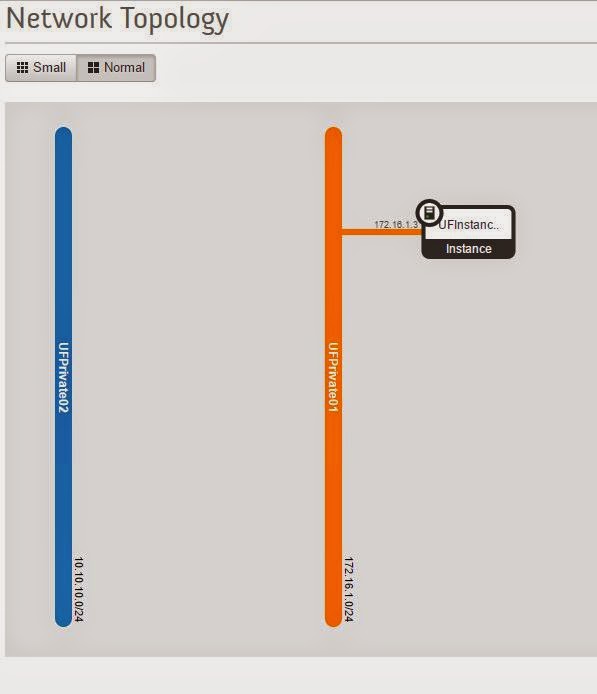
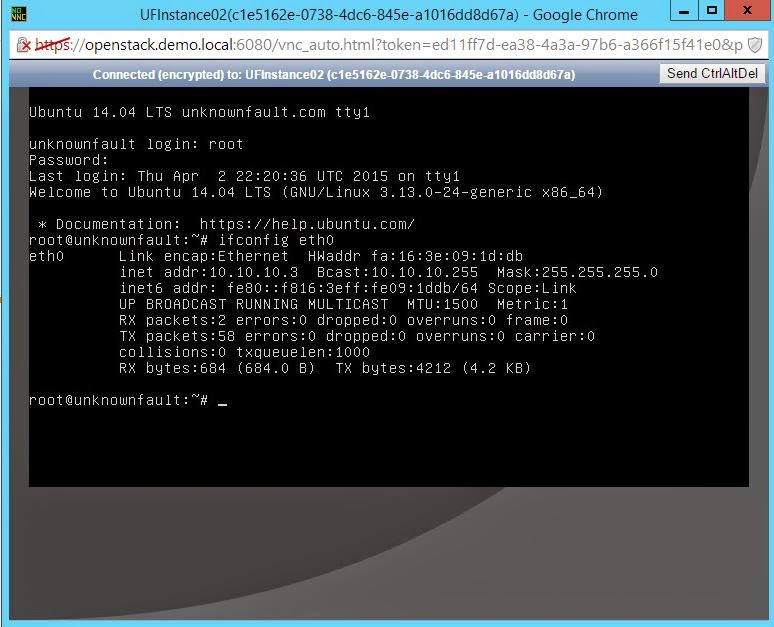
- To validate that the instance has booted up correctly and has got a IP address, open a console to the instance by navigating to:
Project>Network>Network Topology>select UFInstance01>click open console
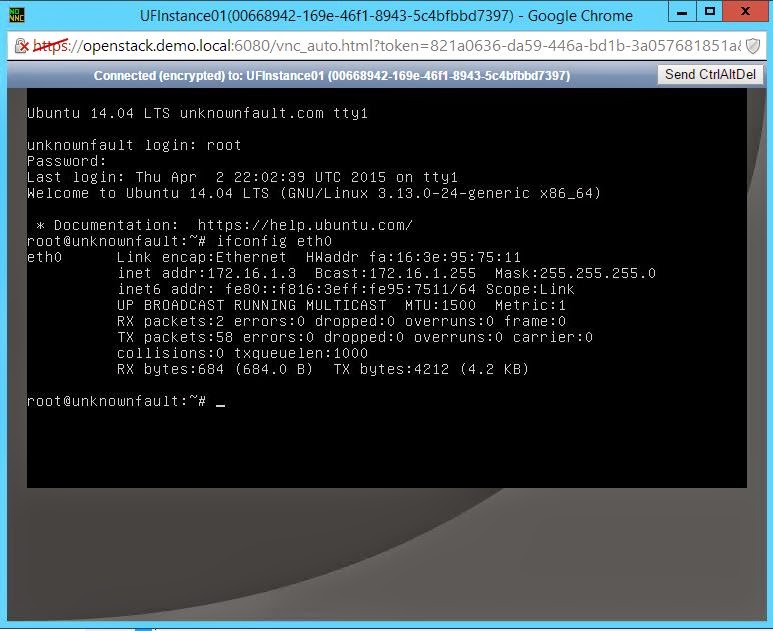
- Login to the Instance and check the assigned IP
- Create another Private network with the following information:
- For Network:
Network Name: UFPrivate02
Admin State: True - For Subnet:
Create Subnet: True
Subnet Name: UFPrivateSub02
Network Address: 10.10.10.0/24
IP Version: IPv4
Gateway IP: 10.10.10.1** - For Subnet Detail:
Enable DHCP: True
- Launch another Instance connected to the newly created network:
- Details:
Availability Zone: nova
Instance Name: UFInstance02
Flavor: m1.tiny
Instance Count: 1
Instance Boot Source: Boot from image
Image Name: UFJeOS - Access & Security: Leave default
- Networking:
Selected Networks: UFPrivate02 - Post-Creating: Leave default
- Advanced Options: Leave default

- Open a console to the newly deployed Instance and check its IP configuration.
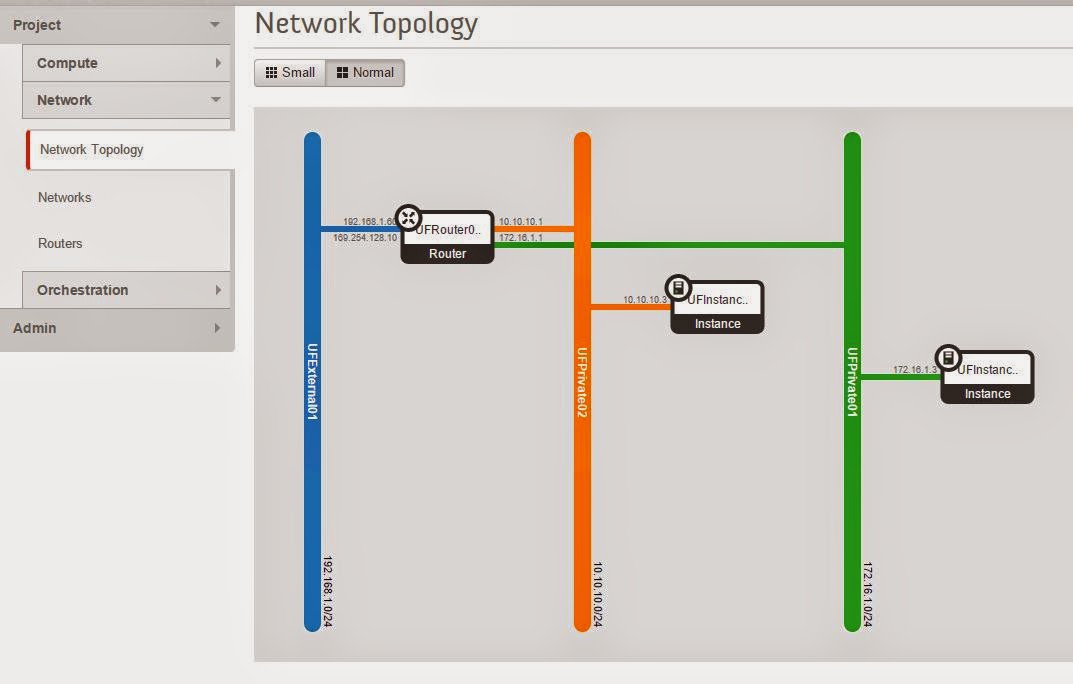
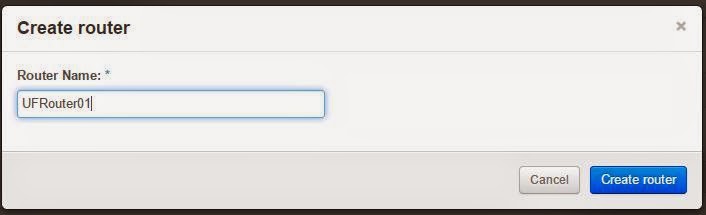
- We need a router to get the instances UFInstance01 and UFInstance02 to talk to each other. In order to create a router, navigate to:
Project>Network>Routers>Select Create Router>Name the router as “UFRouter01”>Click Create router

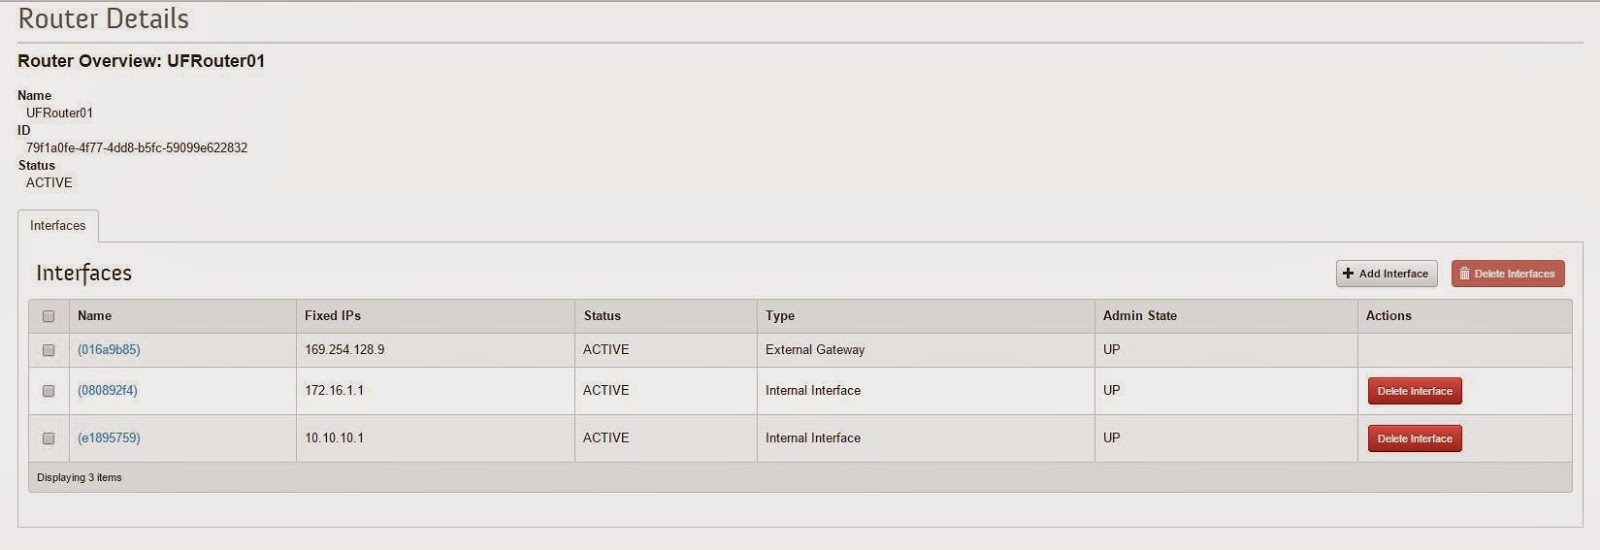
- Select the router, “UFRouter01” and click “+ Add Interface”


-
Add the UFPrivate01 subnet as the first interface. We need not specify an IP address.

-
Add the UFPrivate02 as the second interface. After adding both the interfaces, the router configuration will look similar to:
-
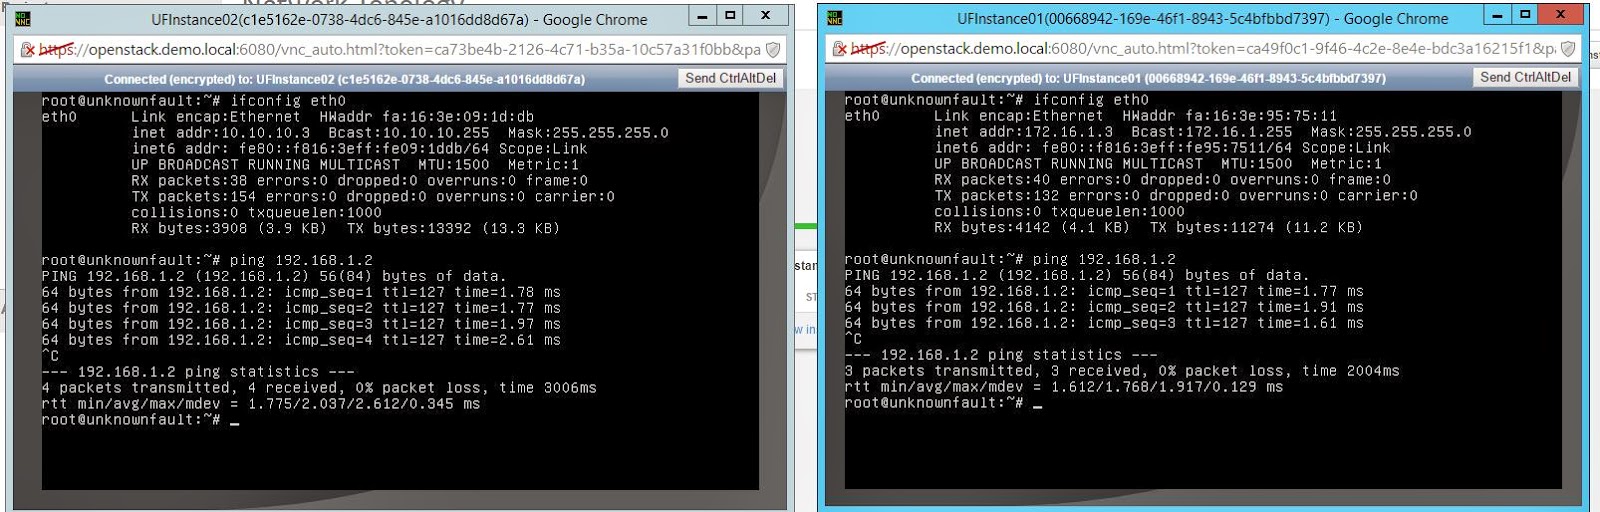
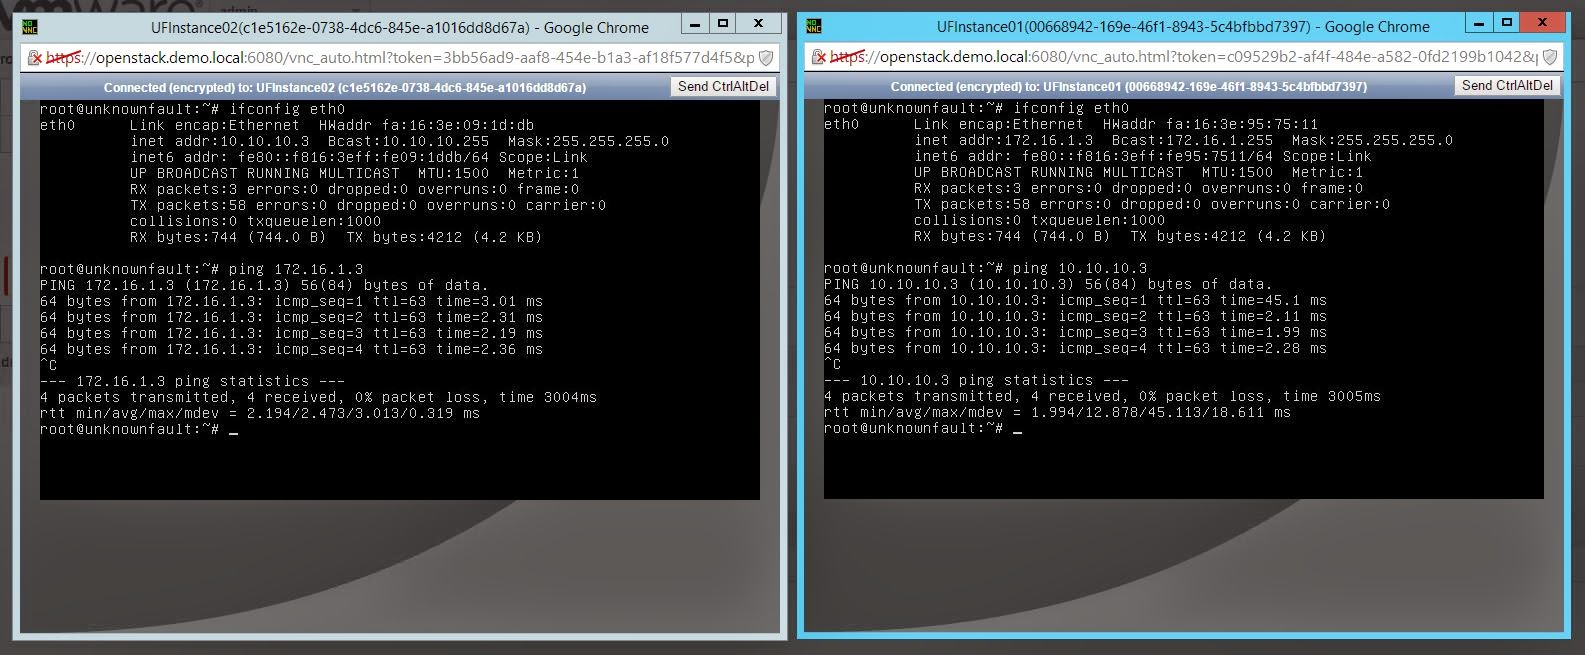
Now ping between UFInstance01 and UFInstance02. Both VM’s will be able to reach each other.
-
Now lets get these VM’s on the external network. My external network in the lab environment is in the subnet 192.168.1.x and all the management VM’s are configured in this subnet and uplinked via a dvSwitch portgroup called “Management”. Before we can create an external network that can connect to the “Management” portgroup on the dvSwitch, we need to find the moid of the dvSwitch portgroup. In order to find the moid of the portgroup, open the following url in a browser: https://< vCenter Server IP/FQDN >/mob and login with administrator credentials
Select content > group-d1 (Datacenters) > datacenter-xx (Datacenter in which the dvSwitch if configured) > network > Make a note of the dvportgroup-xx that you need the instance VM’s to communicate on.
In my lab environment that value is “dvportgroup-27”
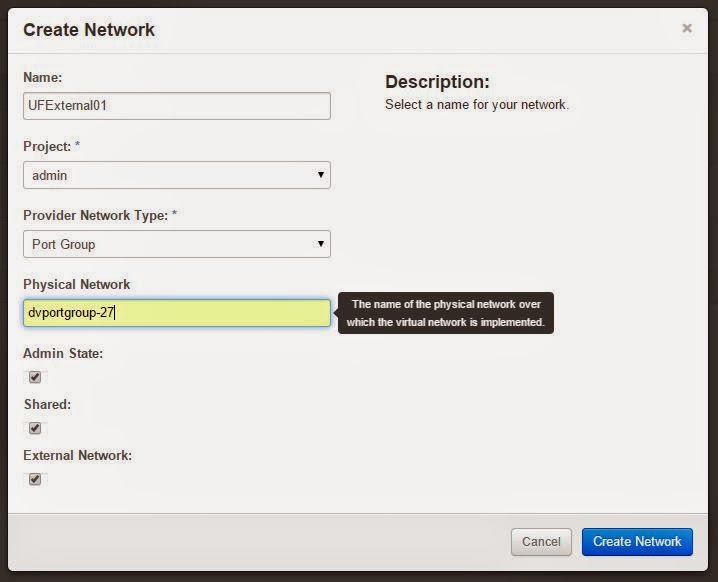
- Login as “admin” into openstack and navigate to Admin > Networks > Create Network and use the following information to create the external network
Name: UFExternal01 Project: admin Provider Network Type: Port Group Physical Network: dvportgroup-27 (replace with the value found from step 20) Admin State: True Shared: True External Network: True
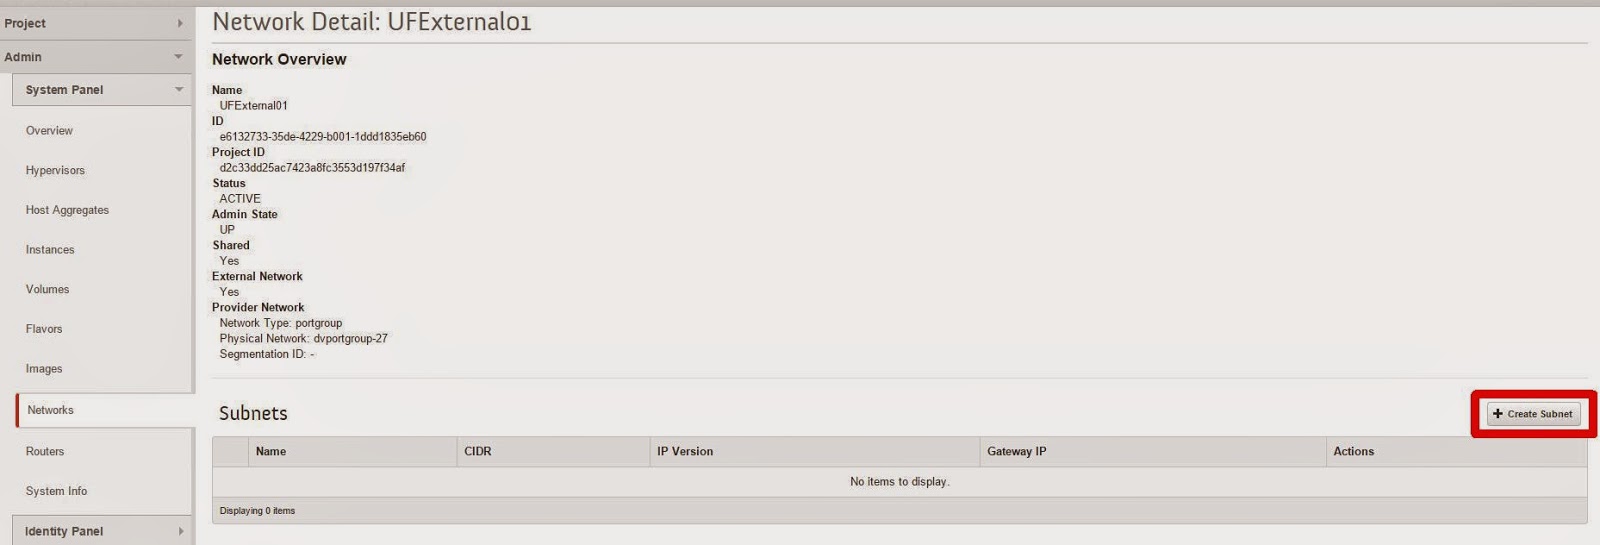
- Create a subnet for the External Network, UFExternal01 by navigating to Admin>Networks>Click on “UFExternal01”>select “+ Create Subnet”
Use the following information to create the external subnet:
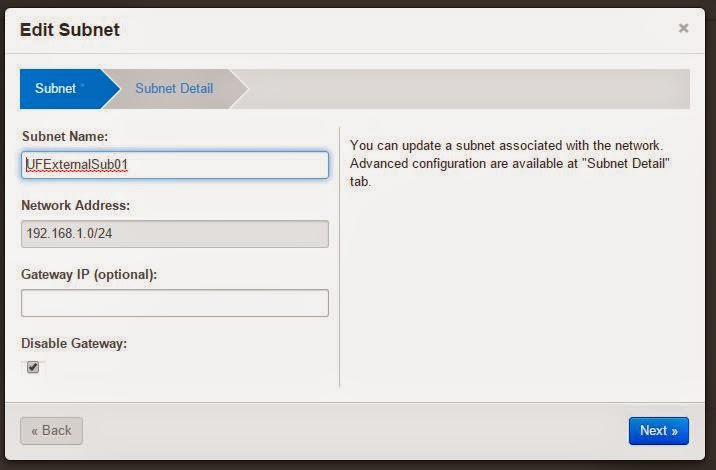
- Subnet
Subnet Name: UFExternalSub01
Network Address: 192.168.1.0/24
IP Version: IPv4
Gateway IP: (I do not have a gateway on the management network)
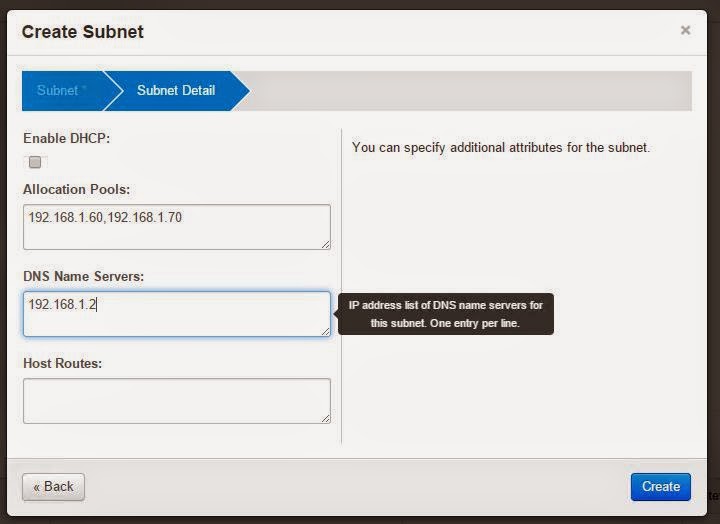
Disable Gateway: True** - Subnet Detail
Enable DHCP: False
Allocation Pools: 192.168.1.60,192.168.1.70
DNS Name Servers: 192.168.1.2
Host Routes:**
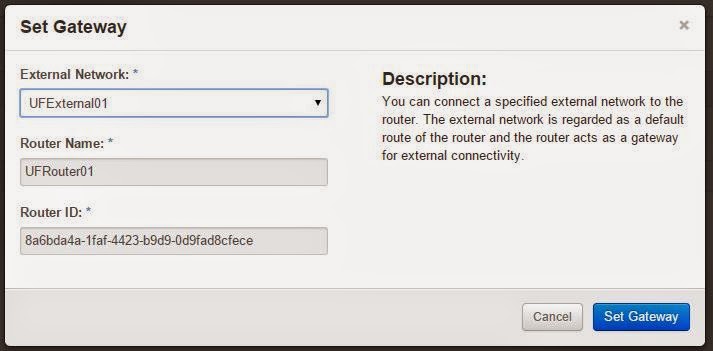
23. Navigate to Project>Network>Routers , select Set Gateway next to “UFRouter01” and select “UFExternal01” as the External Network

24. Ping and confirm if the Instances are able to communicate to the external network